Your First Game: An Infinite Matrix
Due: Feb. 13, 2022 @ 11:59 PM
Important Notes
- Read the submission instructions carefully!
Table of Contents
- Specification
- 1. Complete the Tutorial:
- 2. Add a health system for the player. Your health system should:
- 3. Add a score. Your score should:
- 4. Add health packs. Your health packs should:
- 5. Add player projectile attacks. Attacks should:
- 6. Add enemies. Enemies should:
- 7. Increase the player speed over time. The player speed increase should:
- 8. Add one creative modification that is unique to your game. Some ideas:
- Advice
- Technical Details

Specification
For your first programming assignment, in honor of Keanu Reeves turning 57 years old and the release of Matrix 4 Resurrections you will implement a simple Matrix-themed game. The goal here isn’t to build a AAA game…it’s probably not going to look amazing and that’s fine. The goal is to learn to build an Unreal project from nothing and make an actual working game that expresses some creativity. And in any case, your game will likely be more entertaining than the Matrix sequel movies.

Your task is to do the following:
1. Complete the Tutorial:
Complete this tutorial on making a simple game by Ray Wenderlich. Do not skip the tutorial and just grab the finished code; complete the tutorial. It teaches almost all of what you need to know to implement the additional features below (features that are not included in the finished tutorial code posted at the site). This assignment is individual and each student should submit their own work.
2. Add a health system for the player. Your health system should:
- Be displayed as a bar or number on the UI
- Decrease their health value upon collision with an obstacle
- If player hits an obstacle, they should then pass through the obstacle and their health should be decremented.
- Stop the player only when their health value this 0
- Have a max health value
- Correctly reset to its max health value when the game is restarted
3. Add a score. Your score should:
- Be displayed as a number on the UI
- Increment only when the player successfully goes through a hole in an obstacle
- Reset to 0 when the game is restarted
4. Add health packs. Your health packs should:
- Be a collidable object
- Be destroyed upon collision with the player
- Be destroyed shortly after if the player goes past them
- The implementation for this is up to you. This can be based on a fixed time interval, after the player passes the current tunnel, etc.
- Increase the health value upon collision with the player, up to a max health value
- Appear in tunnels at a randomized rate, but never more than once per tunnel
- Make sure that the health packs are attainable, i.e. not at the very start or beginning of the tunnel, or clipped through the edges.
- Have a semi randomized location in the tunnel that does not collide with other objects
5. Add player projectile attacks. Attacks should:
- Create a projectile on left mouse click that shoots forward down the tunnel faster than the player
- The projectile is destroyed upon collision with anything and after a short duration
- The projectile is created at the player/mouse position
6. Add enemies. Enemies should:
- Be a collidable object
- Be destroyed on collision with projectiles or the player
- Increase the score on destruction by a projectile
- Decrease the health value on collision with the player
- Be destroyed shortly after if the player goes past them
- Similar to the health pack, this can be implemented in a variety of ways.
- The visual representation of the enemy is up to you…it can be simple.
- Please make the enemy visually distinguishable from the health pack! This includes different colors and shapes.
- However many enemies spawned in a tunnel can be up to you, as long as it’s reasonable for the player to pass them.
- For this assignment, it’s okay if the enemies spawn on top of the health packs (although issues like these should be addressed in the final project)
7. Increase the player speed over time. The player speed increase should:
- Get faster over time, either directly based on time, the player score, etc
- It’s up to you if you want the speed to increase forever, or cap at some threshold.
- Increase at a rate that is noticeable but does not ramp up the difficulty too fast
8. Add one creative modification that is unique to your game. Some ideas:
- Health bar decreases along a gradient of colors
- The gradient should constantly update according to the player’s current health (not just set the color based on certain thresholds)
- Add screen shake on collision with barriers and enemies
- Color of the walls change depending on player health
- Add textures to the health packs and enemies
Advice
Start working now…try to complete the tutorial in a couple of days and then work on adding a new mod every two days. Do not be afraid to ask for help…on CampusWire or in office hours. You can help out other students - answering questions on how to do things on CampusWire is very much encouraged. Learning how to implement a mechanic online or from someone on CampusWire is not plagiarism.
Also, do not be afraid to change the initial game defaults in order to make the game more playable. You can have the initial speed be slower, have the tunnels be longer or bigger…change things so that it is a game you think is a reasonably good experience. You will not be penalized for any intentional modifications that are meant to make the game more fun. If you would like to make a modification that explicitly and intentionally contradicts the spec, feel free to ask on CampusWire or explain in your submission.
Keep your code in a repo…and use .gitignore and LFS support to handle large files. You can find a reasonably good tutorial here . You can use the commercial github.com or the internal UIUC github.
Technical Details
The following details are simply suggestions to get started to implement the specification. It’s totally fine to introduce an alternative implementation, so long as the features still match the spec.
Adding a Healthbar
The steps to adding health bar would be:
- Create an int/float “Health” variable for the player
- Create a HUD widget blueprint to display the health
- Update the BP_Tunnel logic to update the player health on collision
- Update the game logic to only stop when the health reaches 0
- Reset the health bar when the game is reset
Hints
There is a video tutorial called “Adding Health and Debug Damage” and “Widget Blueprint Introduction” in the “Welcome to Game Development” course by Unreal Engine, which helps introduce basics of adding a health bar.
The initial project file uses the WallMesh’s “OnComponentHit” to process a collision. However, this may not be desirable for this implementation of health because “OnComponentHit” will be continuously called when the player collides with the wall. Instead, it may be better to use “OnComponentBeginOverlap” and change the WallMesh’s collision preset to “OverlapAllDynamic”, so that the player passes through the wall, and the collision logic is only called once.
The Blueprint graph may also be a lot cleaner if a “ProcessHit” function is made to update the health bar of the BP_Player (otherwise, you need a lot of “BP_Player” reference connections). The “isDead” boolean can optionally be replaced with a conditional depending on whether or not the health equals 0.
Adding a Score
The steps to adding a score are relatively similar to a health bar:
- Create an int “Score” variable for the player
- Add a text widget to the HUD to display the score
- Update the tunnel logic to increment the score properly
- Reset the score when the game is reset
Hints
One tricky thing about updating the score is when to figure out when the score should actually updated (i.e. the score should only be updated when the player successfully passes through the hole). There are probably multiple ways to do this, but this is how I did it:
- If the player hits the WallMesh, the score is decremented
- When the player passes through the TriggerZone, the score gets incremented
- The “Score” text widget in the HUD is only updated after the player passes the TriggerZone
This way, when a player collides through the wall and then passes the TriggerZone, the score is simultaneously incremented and decremented, so the score display does not change at all.
Adding Healthpacks
The steps to adding health packs are:
- Create a static mesh blueprint to represent the health pack
- Add appropriate logic to update the player’s health when obtained
- Add logic to create the health pack during tunnel creation
Hints
In this implementation, the logic for handling a health pack is very similar to that of handling a collision. If the player passes through the health pack, the health pack has an “OnComponentBeginOverlap” function that will update the player’s health and health bar. The end of the function also destroys the actor.
Note that for whatever static mesh is used for the health pack, there must be a collision mesh. Otherwise, the collision will not be detected when the player passes through the health pack. Additionally, the health pack should probably be deleted once the player has passed by it (either by setting a life span, or a separate box collision).
In “BP_TunnelSpawner”, a random number generator can be used to determine whether or not a health pack should be spawned. For example, for a 1/10 chance of a health pack in a tunnel, a range of 0-9 can be used, where a health pack is only spawned when the randomly generated number equals a certain value.
Adding an Enemy
In this implementation, adding enemies included:
- Updating the input actions for a “Shoot” action
- Creating a blueprint for a projectile
- Adding a function for the player to shoot a projectile forward
- Creating a blueprint for an enemy
- Adding logic for the collision between the projectile and the enemy
- Adding logic for the interaction between the enemy and the player
Hints
Similar to the healthpack, the static mesh used for the enemy must have a collision mesh. Otherwise, the collision between the projectile and the enemy will not be detected. Furthermore, a separate box collision may be necessary to detect whether or not the player has passed through the enemy.
To update the score when the projectile hits the enemy, one possible method is for the projectile to carry a reference to the player who shot the projectile. Then, the player’s score is updated upon collision.
Since the player speed is expected to get faster and faster as the game progresses, make sure to scale the projectile speed based on the player speed, so that the player never out-speeds the projectile.
Possible Visual Modifications
Some potential ideas for some visual modifications could be:
- Health bar decreases along a gradient of colors
- Screen flashes red when the player collides with a wall
- Some indicator that the health pack was obtained
- Color of the walls updates according to the player’s health
Submission Instructions
Hand-in will be done on Canvas. You will be expected to upload the following:
- A link to a git repo or drive/box folder containing your project code. It should be possible to build your game in Unreal using the submitted code.
- A short video up to 10 minutes long (can be much shorter) showing your game and demonstrating all the required features. Your video ideally should be a screen capture with brief narration by you pointing out the features as they appear in the game.
Some good options for video capture software are:
If recording narration is problematic (e.g. you lack a microphone) you can skip that part. Please only resort to capturing video using your phone if you have tried one of the above methods and just could not get it to work.
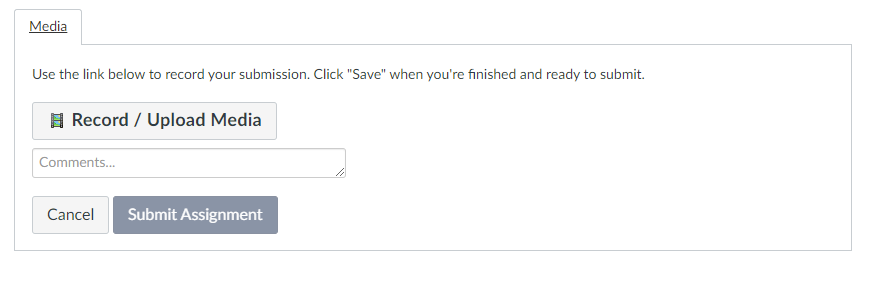
On Canvas you should put the link to your code in the Comment box and then upload a video file using the Upload Media tab.
| Name | Points | Description |
|---|---|---|
| Complete the tutorial | 5 | Have working code that matches the functionality described in the tutorial |
| Health system | 5 | Display and track a player health metric |
| Score system | 5 | Display and track a game score |
| Health packs | 5 | Spawn health packs that can be picked up |
| Speed increase | 5 | Gently increase player speed over time |
| Enemies | 5 | Spawn enemies...the visual representation is up to you. |
| Player projectile attacks | 5 | Add a player controllable projectile weapon |
| Creative addition | 5 | Modify the game aesthetic in some way |
| Total | 40 |